I recently decided to post my video tutorial online and began working on a project outline so viewers could try these printmaking techniques on their own. To participate, please watch my photogravure video tutorial on printmaking techniques, follow the project guidelines below, send me your images and comments via this contact form for public critique and discussion. I will respond!
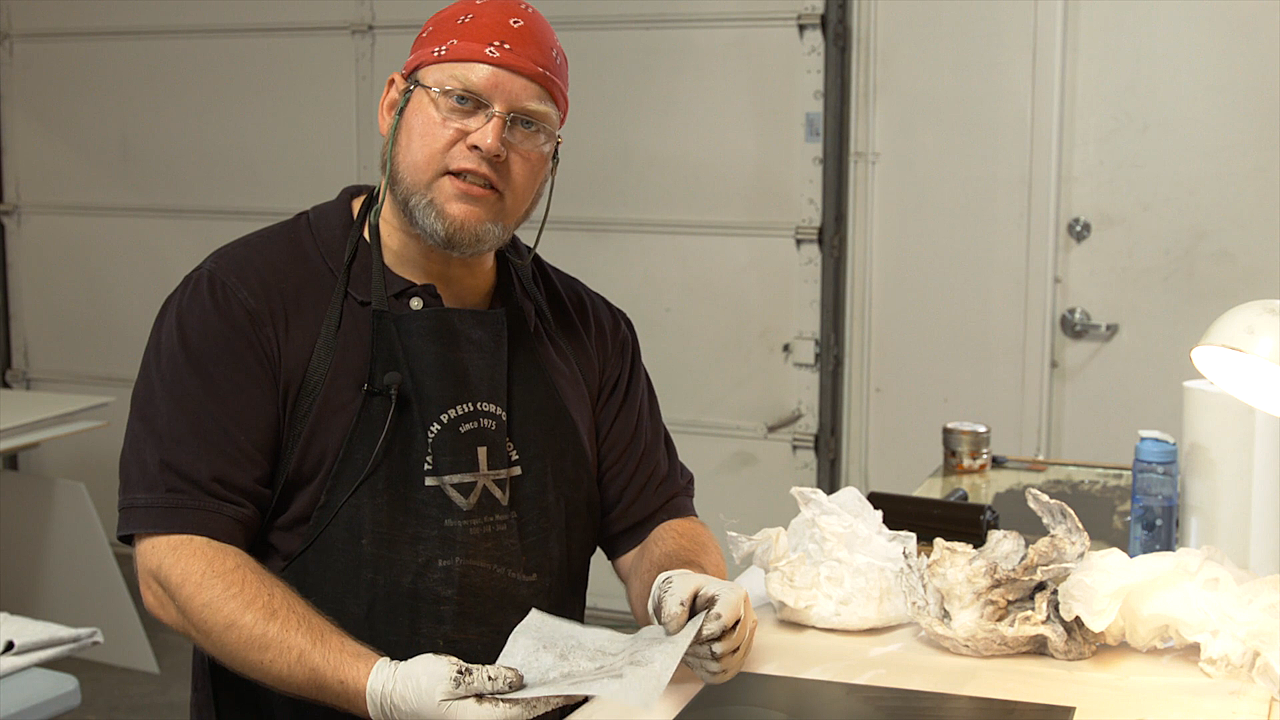
Jon Lybrook demonstrates photogravure printmaking techniques
Contrary to popular opinion, Ansel Adams was not the greatest photographer in the world. Adams was known for his exquisite prints.
This project is to help you begin to incorporate any new printmaking techniques that I demonstrate in the printmaking techniques video to see if you can improve the number of tones and richness you are currently getting in your prints. The assignment is to make 10 unique prints from the same plate, making slight changes to each, analyze what worked, what didn’t and why, and report back to the class on your findings.
Getting solid, repeatable results is the goal of most people involved in printmaking. An incredible amount of time and resources go into fine handmade printmaking, so anywhere time and resources can be saved means more time and money that can be spent toward other work or endeavors!
Printmaking is as much of a science as it is an art or a craft. And, as noted by management thinker Peter Drucker, “You can’t manage what you can’t measure.” Being able to observe the effect of something and understand its level of significance, as well as its cause, is central to being able to improve any process. Printmaking is no exception. By documenting your inking and wiping changes you can repeat your successes.
Apply one of the new techniques shown in the class video to your workflow with each new print, and take physical or electronic notes about your changes, your expected results and your actual results to the outcome in a diary. Your print diary should include extensive details about what was changed in each iteration including:
- The paper used (weight, texture, soaking time, any paper calendaring employed)
- Ink used (proportions of ink and modifiers used)
- Environmental factors you might want to jot down may include the amount of pressure used, room temperature, blowers or fans being used in the vicinity, and anything you’ve found to be a significant environmental factor that affects the quality of your results.
After critiquing all your prints submit your three favorite from among your ten. Compare and contrast them in your journal post. Also note where there is room for greater improvement or perhaps areas where you may have lost some fidelity by doing something differently. Perhaps a certain wiping technique improves your contrast but loses highlight details. Printmaking is an ongoing, but increasingly effective, cycle of wins and losses.

Intaglio Press
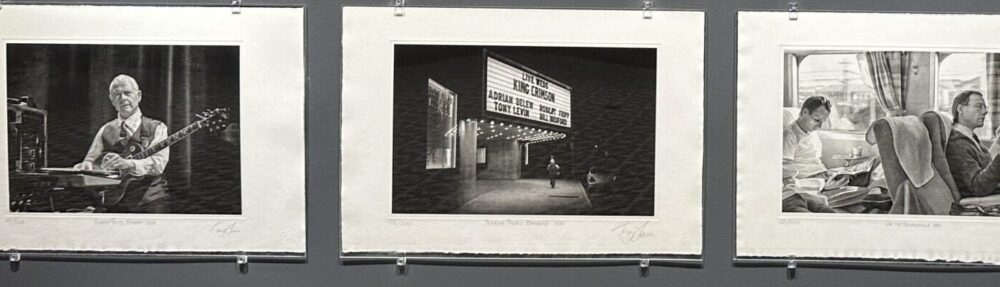
There are hundreds of ways to affect a print during the proofing, as every printmaker knows. You can change the paper you are using – going from something like a cotton Rives BFK 300 gram paper to Kitakata, a 33 g/m2 Japanese kozo will produce a dramatic shift. Not just in tone and color, but in sharpness, clarity, and added depth.
Subtle differences can be achieved through the use of ink modifiers, such as 00 burnt plate oil, EZ-Wipe or by using different colored inks or mixing them in various proportions. Often times you can open up shadow details by cutting the ink with a little bit of 00 grade burnt plate oil. You can also experiment by intentionally leaving more ink in certain areas of the plate, or less. Carefully document what you did and your results and post that to the class as well. Your assignment, again, is to make 10 variations on a print changing only the ink, how you are wiping the plate, or the paper used and post your 3, favorite with comments.
Here’s a breakdown of each of our steps along with variations you could try when making your ten initial prints. Write down your observations about how subtle changes in your execution affect the final print.
Part 1: Preparing the Plate
Sanding the plate is critical for safety. Here are some aesthetic considerations/variations:
- Rounded Corners
- Try different degrees of rounding your corners.
- Try using Fiskar metal sheers to cut your steel-backed polymer plate into a shape, sand the edges, and try to ink and print it! Watch those sharp corners!

Photogravure plate from polymer
Part 2: Mixing the Ink
Here is where you will have the greatest number of choices in how to ink your prints. By experimenting with different inks and modifiers you can adjust contrast, density and translucency in your prints.
- EZ-wipe –note the increased ease of wiping!
- Burnt plate oil 00.
- Magnesium Carbonate for thickening the ink again if it is too loose.
Part 3: Brayering and Wiping the Plate
Brayering is simply to get ink onto the surface of the plate without scratching it. In wiping the plate, we push ink into the pits embedded in the plate, creating a richer image. One aspect of intaglio printing is that ink can remain both on the surface of the plate, and recessed into the plate. This causes the ink to be embedded both in and on the paper. Some things you can do during this stage of the process to affect the results:
- Try leaving excess ink in areas that require more density.
- For stark whites, use a flannel rag and q-tips to wipe the plate in specific areas.
- Use multiple different colored inks on your plate and carefully wipe them into specific areas using tools made from rags or felt. This technique is called À la poupée.
Part 4: Wiping the Edges
Cleanly wiped edges are generally considered best practice and good form in traditional printmaking, so in this lesson I show you how to do it effectively. This is not to say it could not be used creatively, so maybe try these variations:
- Instead of wiping the ink off the edges, wipe it into the perimeter of the plate, creating a hand-wiped vignette effect.
The first couple of prints one makes are not usually that stellar. As I say in the video, polymer plates must be printed two or three times before the plate becomes seasoned and starts printing more uniformly.

Printmaking Techniques
Part 5: Preparing the Paper
There is a lot to be said on the subject of paper in printmaking, far more than the scope of this tutorial will allow me to cover. That said, you should be familiar with how to print on various kinds of printmaking paper. Printmaking paper is specially crafted to hold up to water and pressure required to make intaglio prints in the traditional manner. Generally speaking, heavily textured paper tends to break up the continuous tone of the image and introduce paper inclusions randomly throughout the print. This may or may not be desirable, and using different kinds of paper can affect your print dramatically.
- Obviously there is a wide range of papers you can use in your project. We have found Hahnemühle Copperplate, Hahnemühle Ingres, and the Magnani Rivere Silk lines of paper tend to work very well for this process to get a crisp, clean, continuous tone print (assuming the tone already exists in your plate). The advantage of these papers is no need to calendar the paper when using these specific types of paper. The advantage of being able to make a “normal”, clean print is you can then use that as a baseline to branch out into more creative approaches.
- Chin colle is a technique by which colored shapes of thin, fine art Asian paper such as Kitakata are placed strategically in the print’s composition to lend some color and attention to a given area of the piece. Generally lighter papers are used for chin colle.
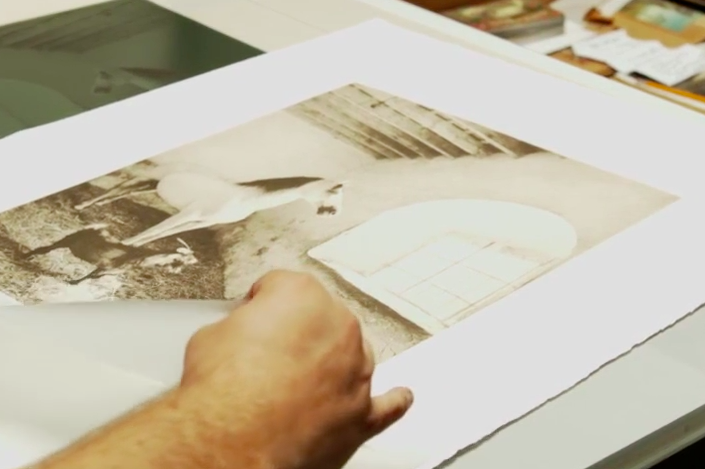
Polymer Photogravure Print: “The Inseparable” by David Brookover
Part 6 : Making the Print
Just as there are hundreds of papers to choose from, there are many different ways to work the press. The functional act of setting the pressure and running the press is a technical knowledge that’s required to control the process. Once control is gained, the knowledge can be used to make creative decisions to experiment beyond your established workflow as a conscious choice – not settle for something that looks kind of interesting rather than really good, because you can’t control the process!
Santa Fe printmaking artist Ron Pokrasso likes to work by continually adjusting and running the print through the press multiple times, keeping it trapped under the roller to aid in registration. By strategically adding layers to the piece each time it goes through the press (and employing techniques such as monotype, multiple plates, a la poupee, chin colle, and post-press techniques such as watercoloring) Ron and his students are able to build upon a composition by thoughtfully adding or taking away from the piece as needed. This is just one example of the many different ways the press can be used to enhance your work. Through continuous work, study and experimentation you will expand your repertoire in ways to express yourself visually through printmaking.
The goal here is to create something unique, and establish a process you can repeat again in the future. Once added to your art arsenal, as it were, and you have mastered it, you should then stray from it to create something hopefully original and beautiful.
To watch the full video click here! Please post your questions and observations and I will respond in kind!
Write me with any questions and I look forward to seeing your work and findings.
–Jon Lybrook – May 2015